Creating Dynamic Content in Oracle Eloqua
Marketing teams, many with limited time and resources, are looking for more efficient ways to send personalized, targeted messages to their audiences. One such option is Oracle Eloqua’s ability to create dynamic content, or customer-specific content, that changes based on user information tied to the recipient. Marketers can use this data to create rules that govern what content should be served to the recipient based on the two (data & rules) combined.
While this option can greatly improve a marketing team’s results, it’s important that the team, at a minimum, has a brief understanding of how dynamic content is created and implemented within the system. This knowledge, along with some useful tips and tricks, can help set your marketing team down a successful path.
Eloqua Dynamic Content Overview
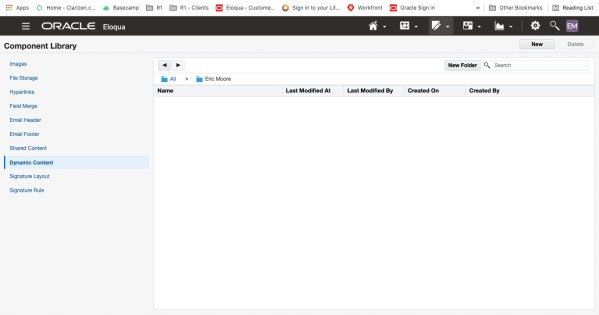
Let’s get started by taking a brief look at the setup of dynamic content within Eloqua. First, locate the Eloqua navigation bar at the top of the page.
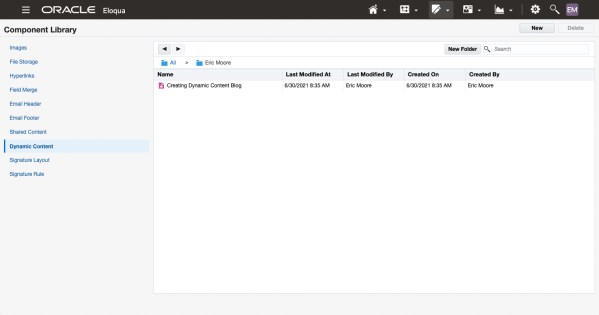
Next, navigate to “Assets“ > “Components“, and then click “Dynamic Content”.
Click “New” to create the dynamic content.
Provide a name for the dynamic content.
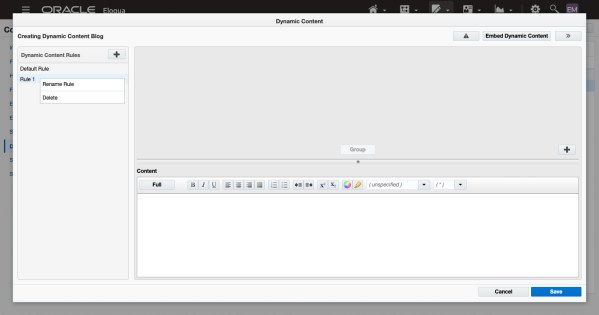
When creating new dynamic content, users are presented with a “Default Rule.” This default rule contains the content that will be served to the recipient when none of the rule conditions are met. It is recommended that this rule content be set first.
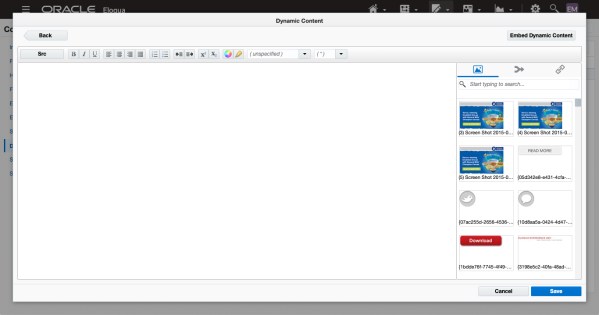
Users creating dynamic content are given two areas/options to create the actual content. One option is a rich WYSIWYG (“What You See Is What You Get”) style editor with some basic text formatting options. Clicking the “Full” button allows the rich editor to expand, providing a few more build options such as placing images, selecting field merges, or linking content. Here you will also find the option for the source editor.
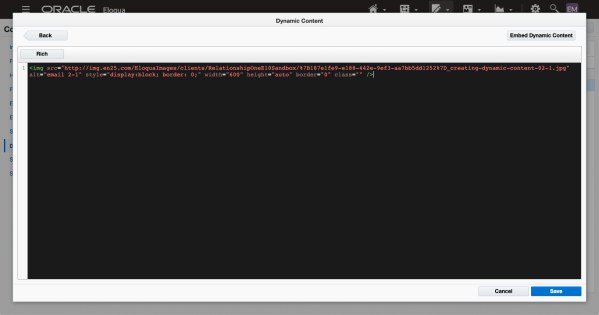
The source editor allows the use of HTML code, which provides users the ability to create advanced dynamic content using coding techniques that are outside of the normal “rich” editor’s available options and capabilities. Once you have your HTML content, copy/paste into the editor.
Once the default rule content has been established, click on the “+” button to add a new rule.
Users can rename this rule by right-clicking on the rule name. This brings up a contextual menu that allows the user to rename or delete the rule.
Next, add the rule content via the “rich” or “source” editor like the process for setting up the default rule. Note: to proceed with adding the actual data rules, you must select the “Back” option in the top left corner after you’ve added your content. This keeps you in a “build” mode and allows you to set your rules based on contact data.
When adding rules, locate the rule “+” button on the right side of the screen. Clicking the “+” button allows users to start adding rule criteria that govern who receives particular content.
For an in-depth look at setting up the dynamic content rules, check out our previous article “Tool Tip: Oracle Eloqua Dynamic Content”. {https://relationshipone.com/blog/tool-tip-oracle-eloqua-dynamic-content/}
Once the rule setup is complete, save the dynamic content. The new dynamic content will then be listed in the chosen save location. Users can manage the dynamic content by simply right-clicking on a dynamic content option to view the contextual menu, which contains options such as “Copy”, “Rename”, “Open”, etc.
Now that the dynamic content has been created, let’s talk about placement within your assets, such as emails and landing pages. In this example, we’ll be looking at placement within an email, but the process is similar for both. An in-depth review of each type of asset can be found here:
Emails: https://docs.oracle.com/en/cloud/saas/marketing/eloqua-user/Help/Emails/Emails.htm
Landing Pages: https://docs.oracle.com/en/cloud/saas/marketing/eloqua-user/Help/LandingPages/LandingPages.htm.
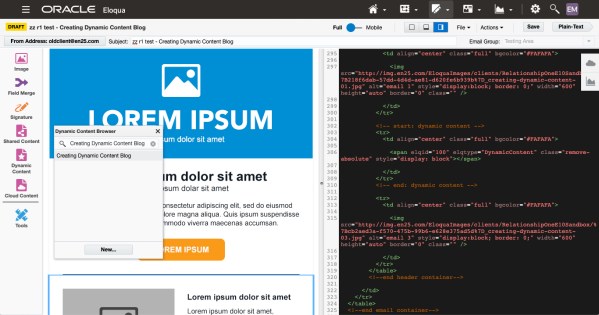
Once the email is open, locate the dynamic content option. In this example, our email is HTML editor-based, so the dynamic content option will be found on the left-hand sidebar. Selecting this will bring up a search menu that allows you to view and search all available dynamic content within the system.
Once a dynamic content option has been selected, simply drag-and-drop the option either into the design editor window or to the desired location within the HTML code itself. When the dynamic content has been correctly placed, a light blue container will appear within the email containing the dynamic content’s default rule content.
Clicking on the dynamic content that was just placed, users can see that the dynamic content now has a teal border with an indicator that the section is dynamic content along with the dynamic content’s name.
To see a rendered view of each dynamic content rule, the user would need to use the “Preview” action along with a contact that contains the pertinent user data. Another option would be to select the “Test Content” action to send an actual test to a user, which also requires the user to have the pertinent user data. This then allows the system to check the dynamic content rules against the contact data and serve content accordingly.
Here we can see an example of searching users using the “Preview” option. Simply search for a contact that contains the necessary data to render previews.
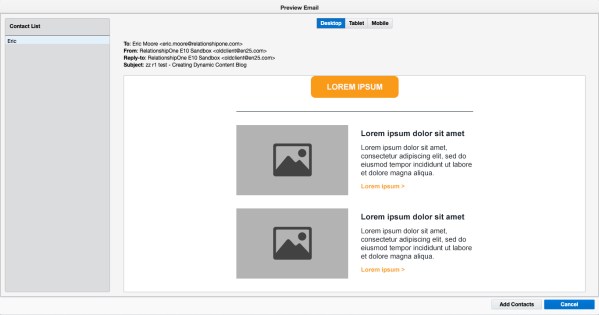
Here we can see how the email will render if a contact lands on the default rule:
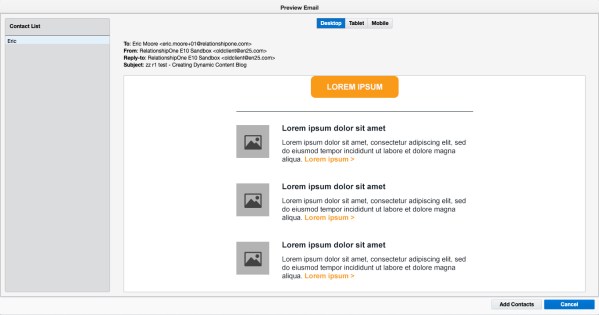
Here we can see how the email will render if a contact lands on dynamic content rule #1:
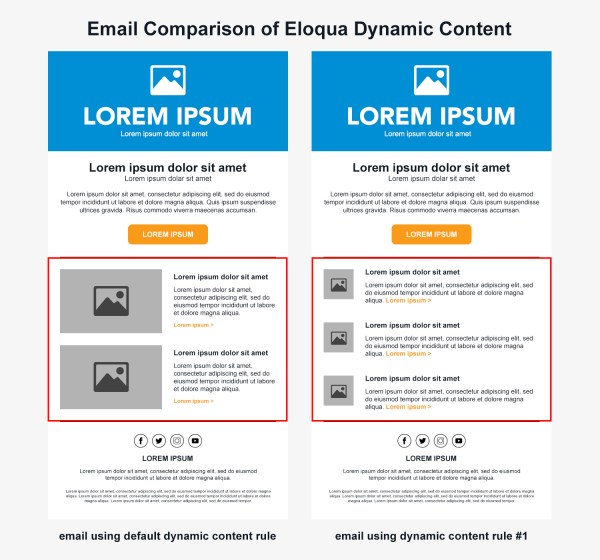
Lastly, a side-by-side comparison of a single email being sent using dynamic content to use customer data to determine which sub-section of content to serve to the recipients:
Tips & Tricks
Now that you’ve seen dynamic content in action, it’s time to start implementing it into your team’s workflow, right? Before you go too far, we here at Relationship One would like to offer some tips and tricks for creating dynamic content that may help your team’s initial setup.
1.) Start by weighing the pros and cons of dynamic content to determine if it’s the right option for your team. If your team is working with fewer assets to consider, dynamic content may not be the right choice—think about using individual builds instead. Conversely, if your team’s needs exceed what dynamic content can provide, you may need to look to an alternative application or service.
2.) Organization, in the beginning, can save you a lot of time later. As dynamic content is being created, your library grows too. Make sure that your team has the proper procedures in place to organize and maintain the library, such as:
● Use of strong and consistent naming conventions
● Creating directories and sub-directories to better organize content
● Creating a tracking system/workbook that can be tied back to the content within the system and can be referred to when needed
3.) When creating dynamic content, it’s best to create the default rule first. This ensures that default content appears if the additional rules are not met or if something is not set up properly.
4.) Dynamic content rule order is very important. During a dynamic content request, Eloqua checks the rules in the order they reside in the system, in a top-down manner (excluding the default rule). Once a rule is matched, the system uses that rule to provide the personalized content to the user and all other rules are skipped.
5.) When creating dynamic content rules that have similar content, start by creating the first rule’s content, including all the branding/styling, links and overall structure of the content. Test to ensure that the content is rendering properly before creating any additional rules. Once everything passes testing, the team can then duplicate the content into the other rules and modify as needed.
6.) When making updates to or removing dynamic content, remember that it creates dependencies in assets where it is used, such as emails and landing pages. Make sure to verify that any changes to dynamic content have properly affected those dependencies.
7.) Creating dynamic content via the “rich” editor (above) does have its limitations. This means that dynamic content is frequently created in the “source” editor (above) due to the allowance of HTML. As such, marketing teams may need the assistance of a development team for more advanced dynamic content requests.
8.) Test, test, test! Make sure to test each dynamic content rule to ensure there are not any problems with content rendering, or any hang-ups within the system due to improper setup.
Closing
It’s easy to see the potential impact dynamic content can have for a marketing team and their ability to scale and send personalized content to users. Whether you’re just getting started with dynamic content or looking for advanced guidance, Relationship One is here to help!


