Code Like a Boss Revisited: Getting Started with HTML Emails
Hello again! It’s been a while since our original “Code Like a Boss” series of posts were published, and some of those posts still stand as our most heavily trafficked pages on our site. Since it’s been a hot minute, I thought it might be time for a fresh take on the series, updating and expanding on our original content and including some new things as well. We’ll focus this time on getting started with HTML emails.
“But my Marketing Automation Platform has a WYSIWYG editor, why should I care about this”, you might ask. Well, often those editors have some limitations regarding how an email can be laid out, don’t allow for a particular styling to be applied to certain elements, or create emails that just don’t work properly in Outlook. Sometimes, you can apply a clever workaround to overcome these limitations, but often, you need to ditch the WYSIWYG and get your hands dirty in actual code. It can seem daunting, but once you get the hang of it, you’ll be slinging code in no time.
So, without further ado, let’s dive in!
(Note: I’m going to make the assumption that you’re already familiar with the basics of web development; if not, please refer back to our Coding Language CliffsNotes post before proceeding. Go ahead, I’ll wait!)
Getting started with HTML emails: Creating the framework
What’s Your (Document) Type?
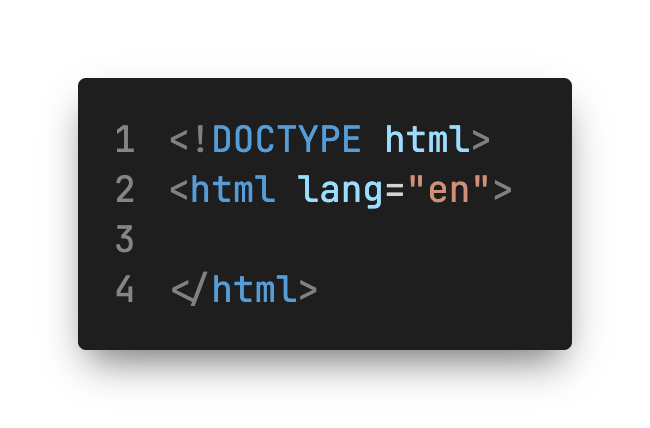
Every HTML document, whether it’s an email or a web page, starts with a declaration that tells the email client or browser what it’s dealing with and how to render it correctly, and that’s the doctype declaration. There are a variety of doctypes that have been used over the years; if you’ve looked at HTML code in the past, you’ve probably seen ones like HTML 4.01 Strict or Transitional, or XHTML 1.0 Transitional. These days, you should use the HTML5 doctype, which looks like this:
Why use this? It’s the latest version of HTML and has excellent support across email clients. In fact, some email clients will only support the HTML5 doctype, so this is one of the rare cases where modern code works better for email development; more on that later.
Defining the Basic Structure
Okay! With that out of the way, we can create the rest of the basic framework for our email. Following the doctype, we have our opening HTML tag, which starts the container that encompasses the entirety of the document, except the doctype, and tells the email client or browser that it’s looking at HTML content (yes, even though we just had the doctype doing the same, this is still required). It would be a good idea to include the “lang” attribute within the HTML tag so that the email client or browser knows what language is used within the document; you can read more about that on MDN. We’ll set ours to English:
Using Your Head
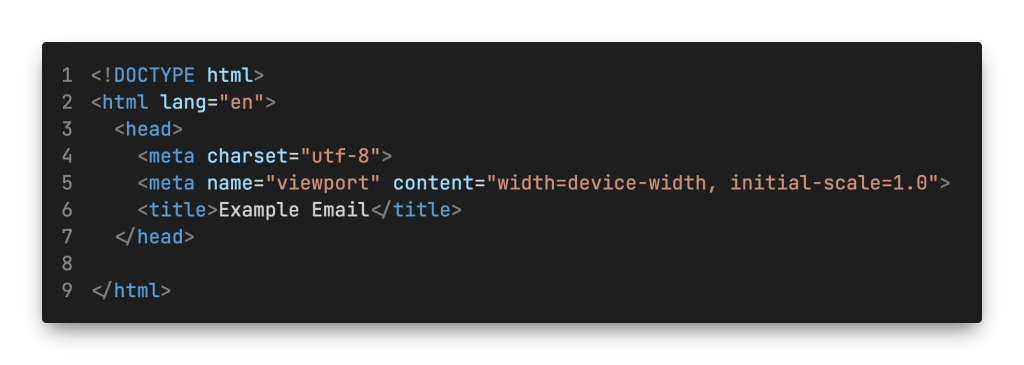
Now that we have the container, we need to start putting things in it. The first thing we’ll add is the head element, which contains additional information about the document, including meta tags (data about data), the title, styling, and so on; in other words, Important Stuff. In the example below, you can see I’ve added the head, as well as several tags within it:
- First, there’s a meta tag defining the character set used for the email as UTF-8; this may differ depending on what language you’re using within the email.
- Second, a meta tag defines the viewport; this is important for ensuring that your email displays properly on smaller screens (like smartphones). The tags content here is ensuring that the email initially displays at the width of the device’s screen, without any zoom applied. There’s some debate as to whether these are helpful for email clients, but it’s not going to hurt to include it.
- Finally, a title tag; while this will not display within an email client, it will display if the email is displayed within a web browser, so it’s a good idea to include it. As a suggestion, you might set it to the email’s subject line.
There are other helpful meta tags that we can add here, along with CSS styles, but those will be covered in another post; we’re focusing on the basics here today.
Working the Body
Now that we have the head defined, we can work on the email’s content, and we put said content into body tags.
Earlier, I mentioned that the HTML5 doctype was one of the rare cases where modern code worked better for email development. Unfortunately, coding standards for email are largely stuck in the late 1990s/early 2000s, largely thanks to Microsoft Outlook, and this means the table tag will become your friend, enemy, and constant companion.
Side note: For a very long time, Outlook used the HTML rendering engine from Microsoft Word which, frankly, had its own rather creative interpretation of how things should be displayed, and eschewed modern HTML coding standards. While tables were consistently supported, elements like div tags, and most importantly, specific CSS rules to control their sizing, were not. This led to frustration as email developers were forced to work around these limitations if they wanted their emails to display properly. While Microsoft finally started to use a more modern rendering engine in 2022, there’s still enough users out there on older versions of Outlook that we still need to use these methods.
Keep Your Friends Close and Your Tables Closer
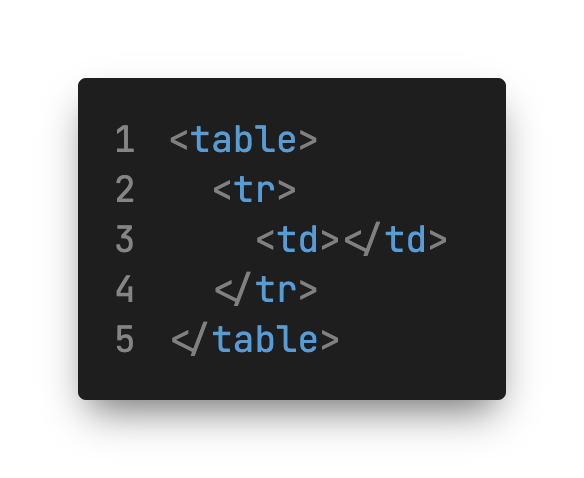
If it’s been a while since you’ve worked with a table tag, here’s a quick reminder of how they’re structured:
At a high level, each table starts with a table tag, to define the overall container. Then you define one or more rows using the tr tags. Finally, you define one or more columns within the row using the td tags, which define individual cells (you can also use the th tag as well, but for now, we’ll focus on the former). You must have these three components to have a table, and you must close any element you open with the appropriate closing tag. One of the more common causes of email rendering issues is a missing closing tag, so make sure that you include them!
Including Attributes
I’ve mentioned attributes previously with the HTML tag; attributes are properties that can be set on a particular element and are always placed in the opening tag of an element. They’re defined by starting with the attribute’s name, followed by an “=” and then their value; values should always be enclosed with double-quotation marks.
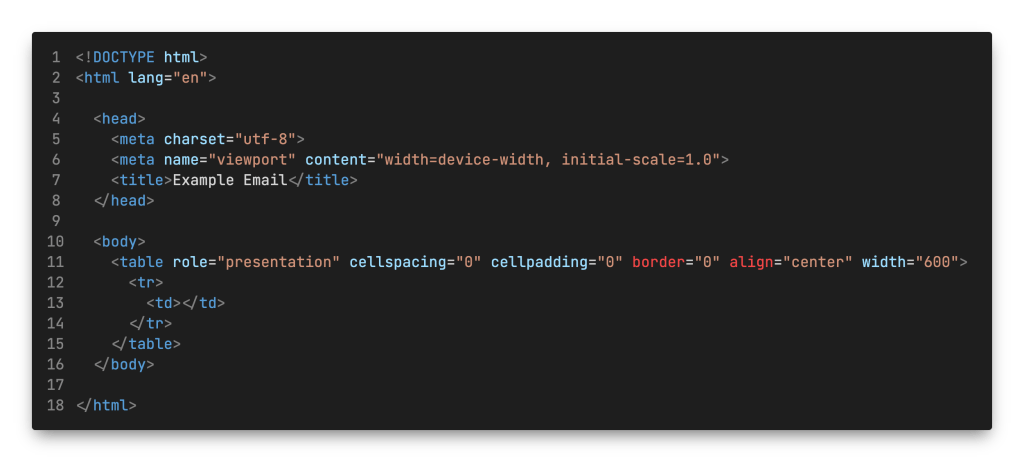
Tables have a set of attributes that can be applied to them; while all of these listed below are deprecated in HTML5, we still need to set them because of, you guessed it, Outlook:
- align: Sets the alignment of the table; options are “left”, “right”, or “center”.
- cellspacing: Sets the amount of space between table cells in pixels, e.g.: cellspacing=”0” (note that there isn’t a unit included with the number).
- cellpadding: Sets the spacing between the cell border and its content, again in pixels.
- border: Sets the width of the border around the table in pixels; any integer can be entered here, and entering “0” removes the border.
- width: Sets the width of the table in pixels (600 pixels is the standard width we use).
There’s another attribute that we should include here for accessibility purposes, and that’s the role attribute. Since we’re using tables as structural elements instead of content elements, we should set their role attribute to ”presentation”; this will tell screen readers and other assistive technologies to ignore the table structure and only present its content instead. If the table was for actual content, i.e., tabular data, we would not set this attribute to allow assistive technologies to parse it and present the data to the viewer.
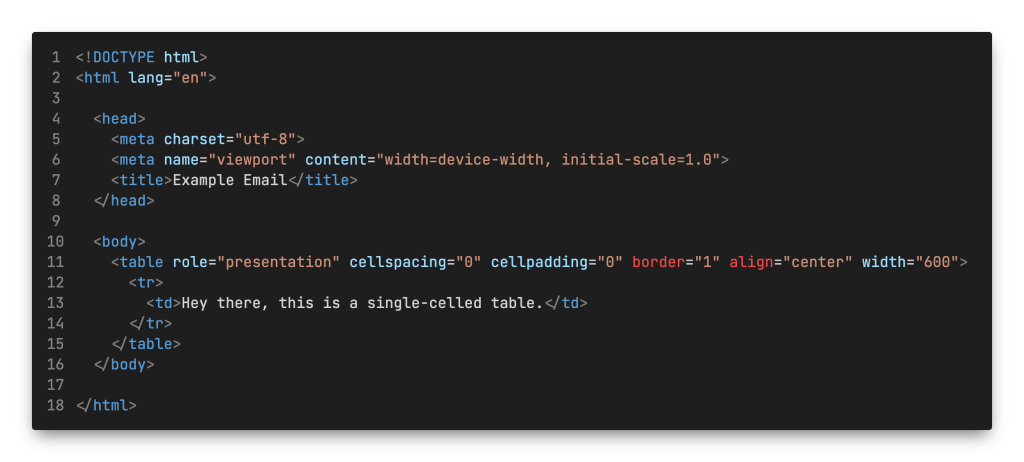
So, if we apply all of that to our in-progress framework, we get this:
Looking good. Now, let’s start adding some content. If we add some text into the defined table cell above, and set the border to “1” so we can see the structure…
We’ll get the following in the email client or browser:
And we’re off and running! We’ll usually use this kind of table, minus the introductory text of course, as the basis for our emails. Setting it to a specific width and centered, we can use this as a “wrapper” element to contain the content of the email so that it remains centered and at the width we’ve specified. In fact, we can even add a class to it named “wrapper” to note its function (and to potentially target it for styling later).
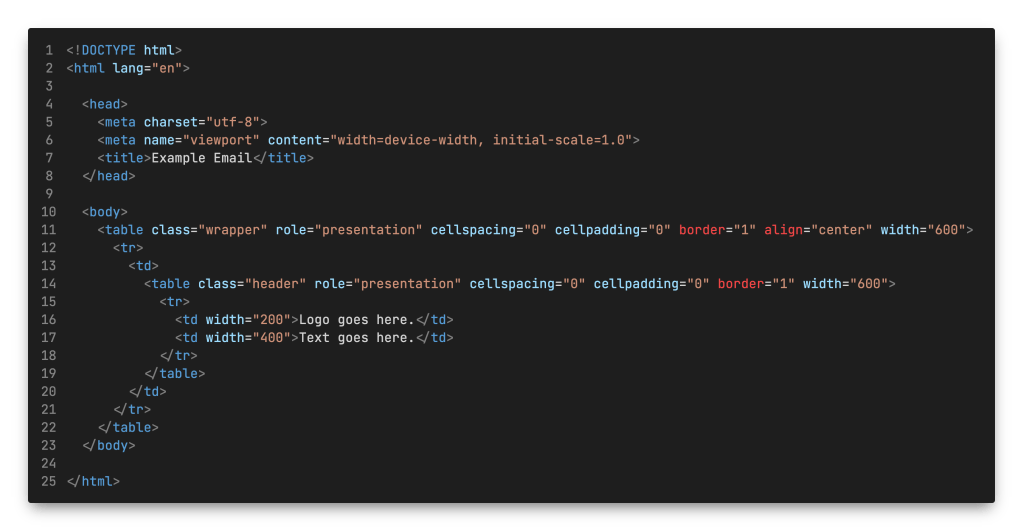
Now that we have the wrapper, let’s add some more structure to it. Let’s say we need to create a header section for our email; branding is important, right? Inside our wrapper, we can add another table, also known as “nesting tables”. Our new table will have two columns: one for the logo, and the other for any text that might need to be added:
The code above results in the following in our email client or browser:
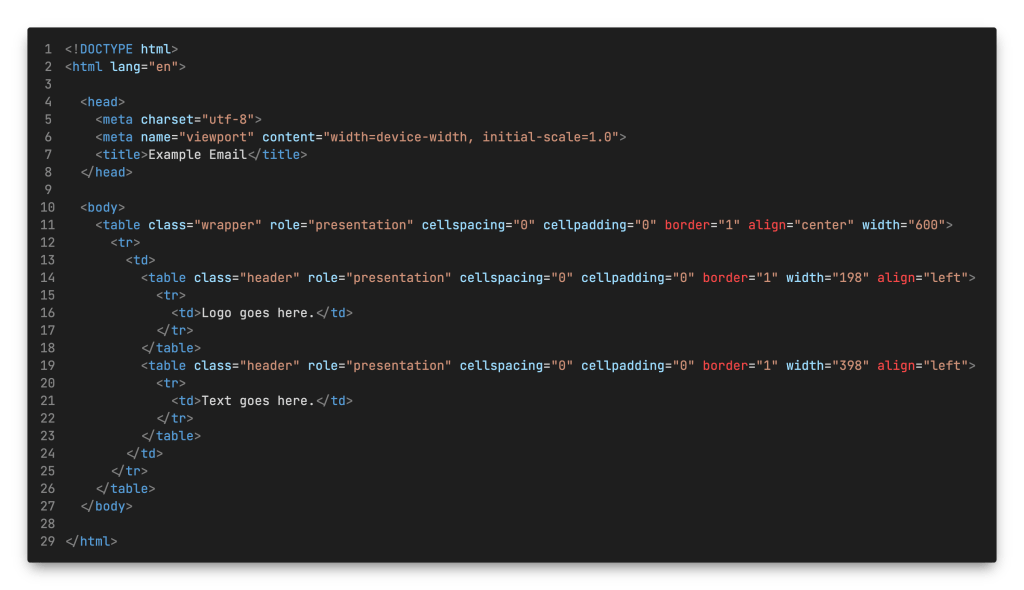
Beautiful, isn’t it? However, we should probably use a different method for this, which is having two tables positioned next to each other. We’ll use the align attribute to make sure that both tables snuggle up to each other on the same line. We’ll also need to set their widths, and consider the borders presently in place on each, e.g.: 200-pixel width – 1 pixel left border – 1-pixel right border = 198-pixel width for the left table; doing the same calculation results in a width of 398 pixels for the right table:
Which produces this:
Looks pretty much the same, right? The only difference is the doubled border between the left and right tables, but those borders are only there presently for illustration purposes and wouldn’t usually be seen in “the real world”.
We’ll use a variation of this layout method when we start to take responsive design into consideration down the road, but that’s yet another topic for another day. Basics first!
If you want to add more content, and of course you do, just add more rows. Where you add them will depend on how you want the email to be laid out, since email layouts are primarily combinations of nested tables arranged in various configurations. Just remember to make sure that all your elements are closed properly, nested elements are properly contained, and make use of your borders while building to see where elements are sitting. Play around with it and have fun!
Next Time, and in the Meantime
In our next posts, we’ll talk about style, specifically, CSS stylesheets: what works, what doesn’t, and some CSS best practices specific to email. In the meantime however, feel free to reach out to us if you have any questions about or need help getting started with HTML emails or landing page coding; we can help!


