Best Practices for Building Forms and Processing Rules | Part 1 of 2
Learning about your contacts and prospects can be accomplished in a few different ways. Forms are one of the most powerful and effective means. By placing a form on a landing page, web page, or social media site, your contacts can provide varying degrees of personal information that you can use to customize future communications. By filling in their information and submitting the form, email recipients or visitors are “opting into” your marketing campaign (this should be clearly stated in the text associated with the form).
Forms can be very simple or complex depending on your needs. You can include a wide range of fields to gather information about your existing or potential customers; however, be careful not to include more fields than are necessary. Limiting the number of fields will reduce “form fatigue” and/or abandonment and increase the participation rates in your marketing campaigns. Also, make sure that the amount of information you request corresponds with the value of the information provided. For example, if you are providing a white paper about a topic of broad interest, you might only ask for the first name, last name and email address. If the call to action is to view a demo, you may also want to ask for their company name, title, industry, etc.
In this two-part series, we will explore creating and styling forms and building proper processing steps. So, let’s get to the fun part – creating your form!
Create your form:
- Navigate to Assets , then click Forms.
- Click Create a Form to open the Template Chooser window.
- Select the appropriate form template and click Choose.
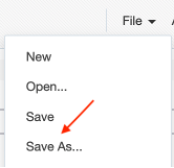
- Click File > Save As…
- Name your form and save it in the appropriate folder.
Create your form settings:
Click to configure your form settings:
- Validation Failure Page: the landing page to which the submitter is redirected if the form is unavailable or if the form is not completed properly. You can use the Oracle Eloqua default page or choose your own landing page from the drop-down list.
- HTML Name: Oracle Eloqua automatically generates an HTML name for your form. You can use this or create a new one. I like to use the same name as the actual form name, but this is up to your discretion.
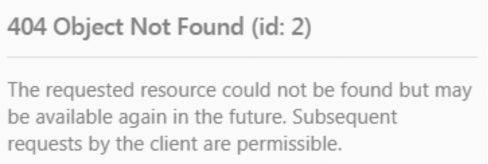
*Note: the HTML name cannot be longer than 50 characters; no spaces are allowed. - Allow Form Submissions: this will default to enabled. If the option is disabled, the form remains visible but will not accept submissions via the landing page or API endpoints. A user who tries to submit the form via the landing page will see this error message:
A user who tries to submit the form via API will see this error message:
Add your form fields:
Click to add your form fields:
**All forms must contain the email address field as this is a required field in Oracle Eloqua.
- To add a contact field, form element, or field group, just double-click on the field in the left navigation column and it will automatically be added to the canvas.
- You can add the fields in the order you’d like them presented.
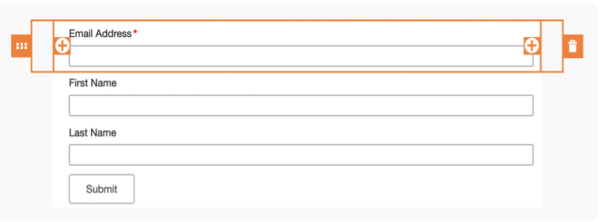
- To move a field, click on the field so that you see the orange layout box, then click and drag the left handle with the “grid” icon to the position on the canvas you’d like the field to be presented.
- To delete a field, click on the field to see the orange layout box and click on the “trash can” icon.
Create your form styling:
Click to add your form styling
General Properties
Use the General Properties options to configure each form field. The options available vary depending on the field type selected.
- Click on the field you’d like to style, and the General Properties will open in the left navigation column.
- Label: the name that is shown next to or above the field. Oracle Eloqua will default to the contact field, form element, or field group name. You can change this name if you choose to do so.
- Instructions: optional instructions that help the user complete the field. This is shown as small text below the field.
- HTML Name: the name by which the application recognizes the form elements.
*Note: the HTML name field can contain up to 50 characters, no spaces. - Data Type: determines what can be entered in the field and how it is formatted. You can choose from Text, Paragraph Text, Numeric, or Date. *Note: a Textfield may contain up to 100 characters, whereas a Paragraph Text field may contain up to 1,000.
- Prepopulate field data: select a default value used to prepopulate the field with information that Oracle Eloqua has already collected about a contact.
- None: by selecting None, no prepopulation will occur, and the contact will have to manually fill in this field.
- Static Value: this will allow you to manually hard-code a value in this field.
*Note: a submitter may change this value. - Field Merge: choosing this option will allow you to prepopulate the field with data that exists on the contact record, custom object, or email group.
*Note: This option is not available for all field types.
Field Validation
Validation options are used to mark individual fields as required and verify that information entered by the visitor is in a specific format. The options vary depending on the field type selected.
- This Field is Required: check this box if the field is required for the visitor to submit the form. A red asterisk will appear next to the field label to indicate that it is required. You can customize the error message that appears or use the default message that is provided.
- Must contain a valid email: use only if this field is expected to contain an email address value. This validation checks for the conventional email address format. You can customize the error message that appears or use the default message that is provided.
- Must contain a valid number of characters: you can specify minimum and maximum character counts to help ensure consistent data format. This is useful for text fields you use to request data that adheres to a specific length, such as phone numbers, account numbers, or ZIP codes. You can customize the error message that appears or use the default message that is provided.
- Important: due to the potential for phishing attacks, Oracle Eloqua prompts you to confirm your setting change if you disable this option or set the maximum character count to more than 35. If you receive this warning prompt, click Yesto retain your setting changes, or No to revert to the default enforcement of a 0-to-35-character count range to reduce security risks. This applies to any single-line text field, including hidden text fields and hidden campaign ID fields.
- Must not contain any URL: prevent data in the form field from being saved to the contact record if a URL is present. By default, Oracle Eloqua does not allow URLs to be submitted from text and paragraph text fields, such as Single Line Text, Paragraph Text, and Hidden Fields. However, you can override this security feature to allow URLs from those fields. You can customize the error message that appears or use the default message that is provided.
- Must not contain any HTML: prevent data in the form field from being saved to the contact record if HTML is present. Allowing users to submit HTML in a form is a security risk. However, you can override this security feature to allow HTML from those fields. You can customize the error message that appears or use the default message that is provided.
Field Properties
- Individually customize each field width using the values provided in the drop-down. This option is available for every field type.
Submit Button
- Use a standard submit button: Oracle Eloqua will auto default to this option. You can choose to use this or select Use a custom image.
- Label: Oracle Eloqua will default to “Submit,” or you can change this to the label of your choice; we recommend something positive and action-oriented, e.g. “Contact Us,” “Download Now,” “View the Webinar,” etc.
- Use a custom image: you can choose to select a custom image for your submit button. There are 2 options; you can Browse your image library for an existing image or Upload a new image.
- Alignment: click the drop-down to set the alignment of the submit button. The options are default, left, right, and center.
There you have it! Now you are ready to go and build that form. Come back next time for details on how to create your processing steps (the brain behind your forms).
Thank you for subscribing!


